Using the Printout
Learn how to use the printout button and the options available for printouts
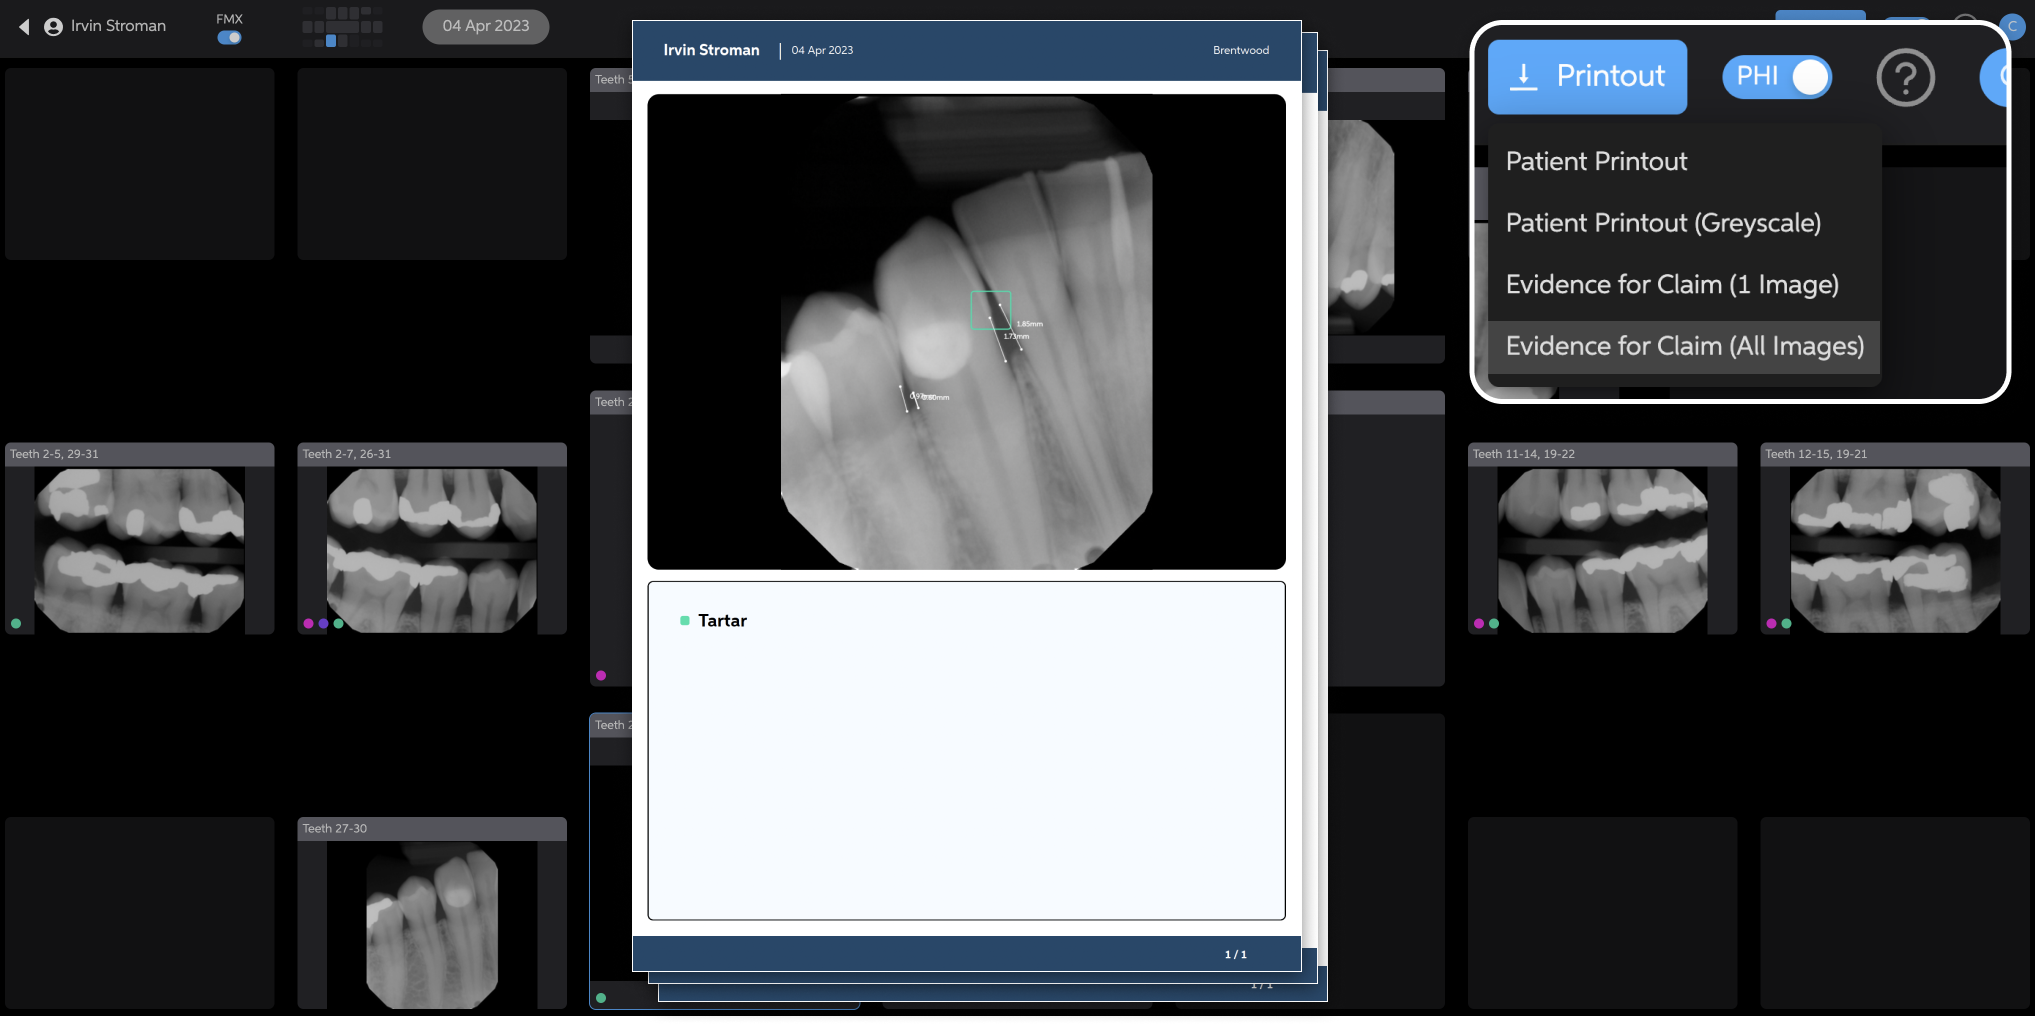
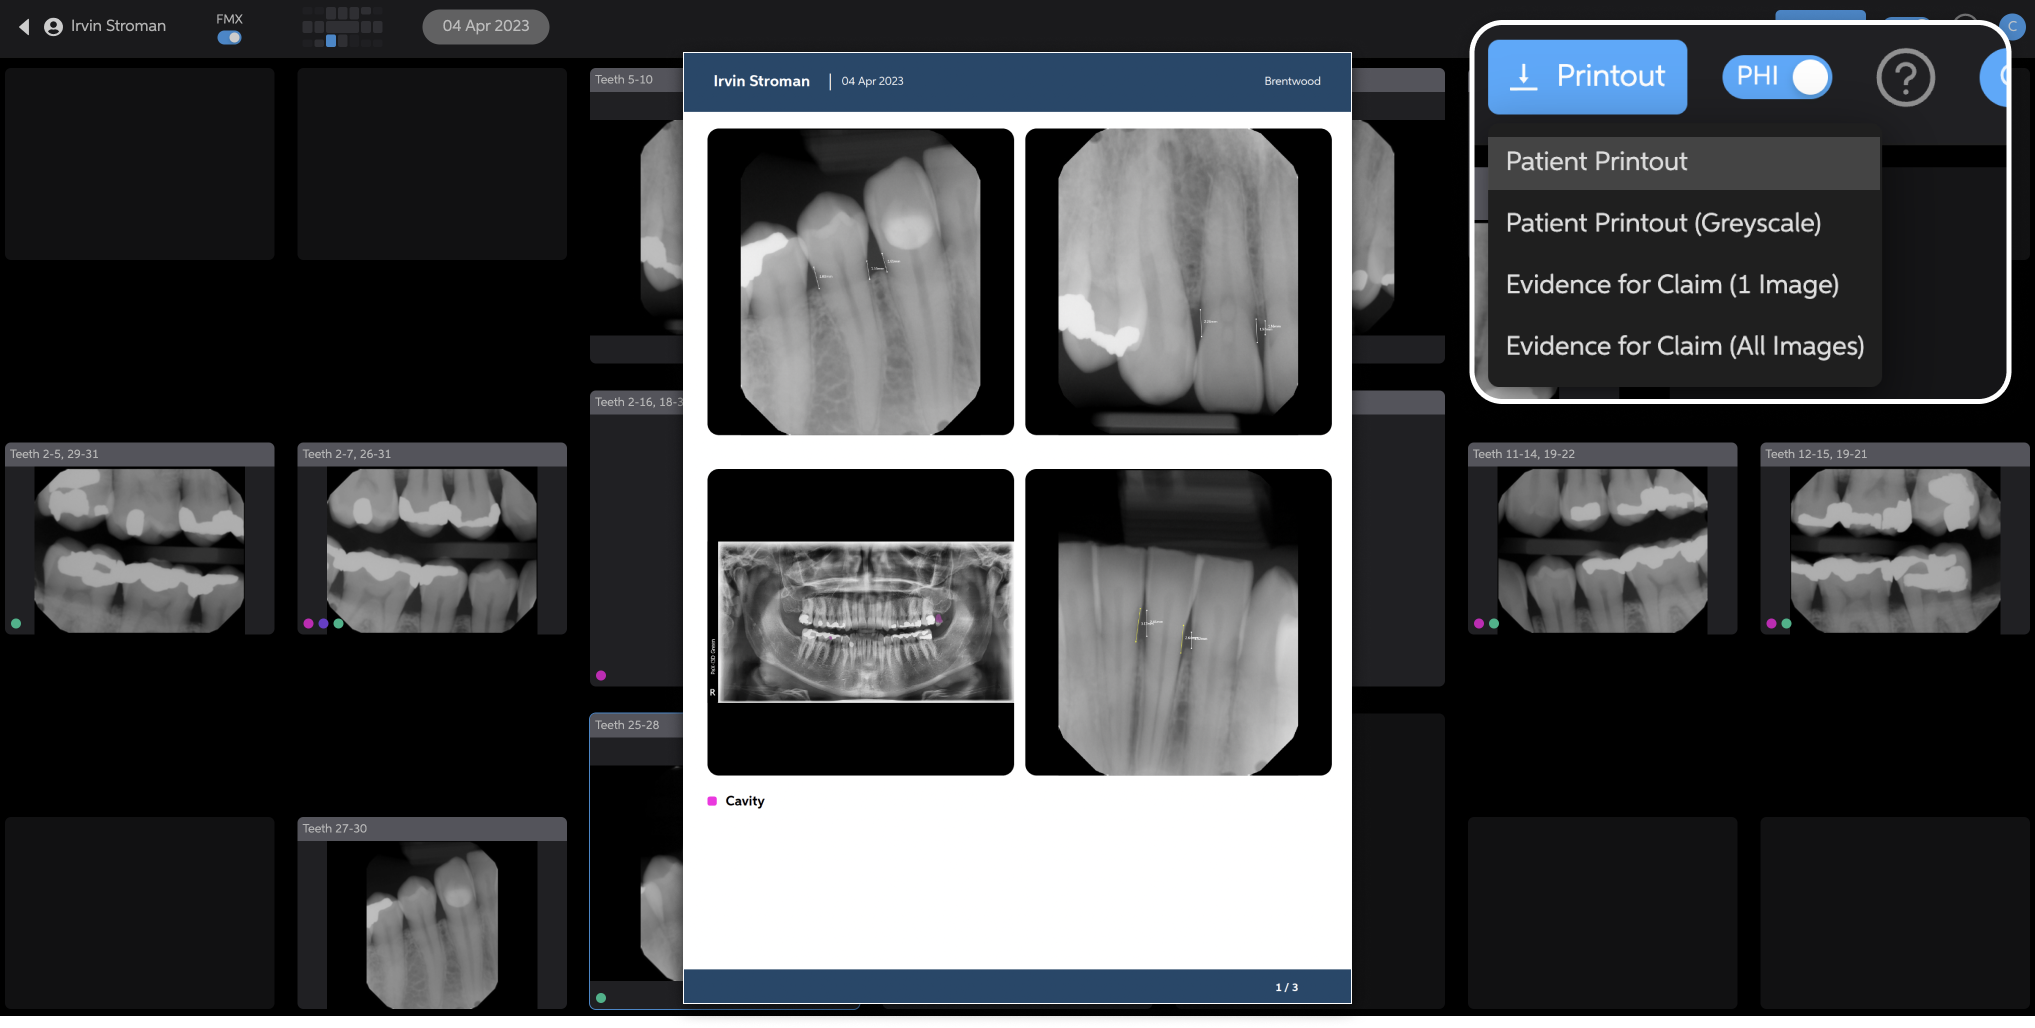
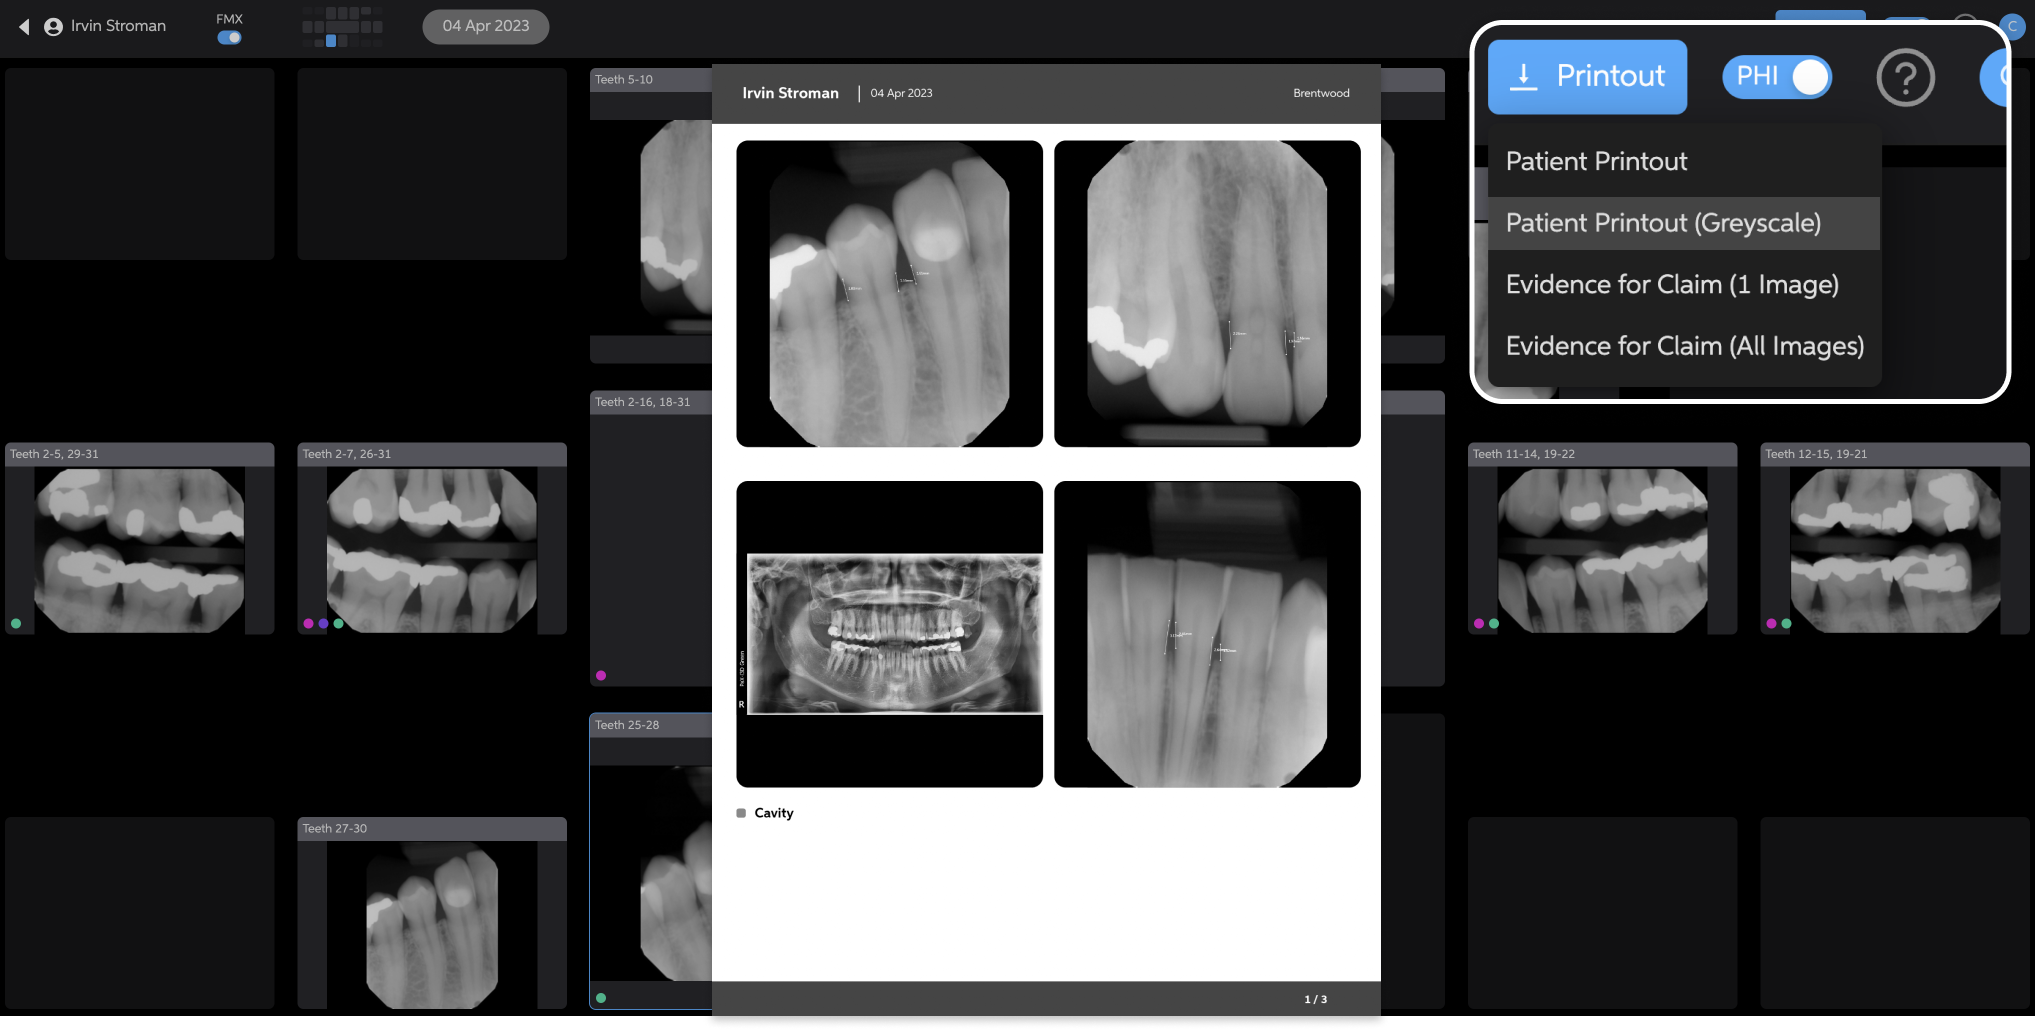
Second Opinion® offers several options for downloading PDF's of your radiographs to print or attach to documents. Hovering over the blue printout button in the top-right hand corner of the screen will drop down the four options. Click on the printout option you would like to generate. The blue button will display 'Generating' while the PDF is being created. Once it's done the PDF download can be found at the bottom-left hand corner of the screen in the Chrome browser (please note that in the Edge browser downloads can appear in both the bottom-left hand or top-right hand corner of the screen based on your settings).

The patient printout option provides a PDF of the entire series of radiographs displaying four radiographs on each page. The detections appear just as they do in the Second Opinion® software and applicable detections are listed under each radiograph.
The patient printout (greyscale) option provides a PDF of the entire series of radiographs displaying four radiographs on each page. The detections are colored grey and applicable detections are listed under each radiograph.
The evidence for claim (1 image) option provides a PDF of the radiograph you are viewing when you choose the printout type. The detections appear just as they do in the Second Opinion® software and applicable detections are listed under the radiograph.
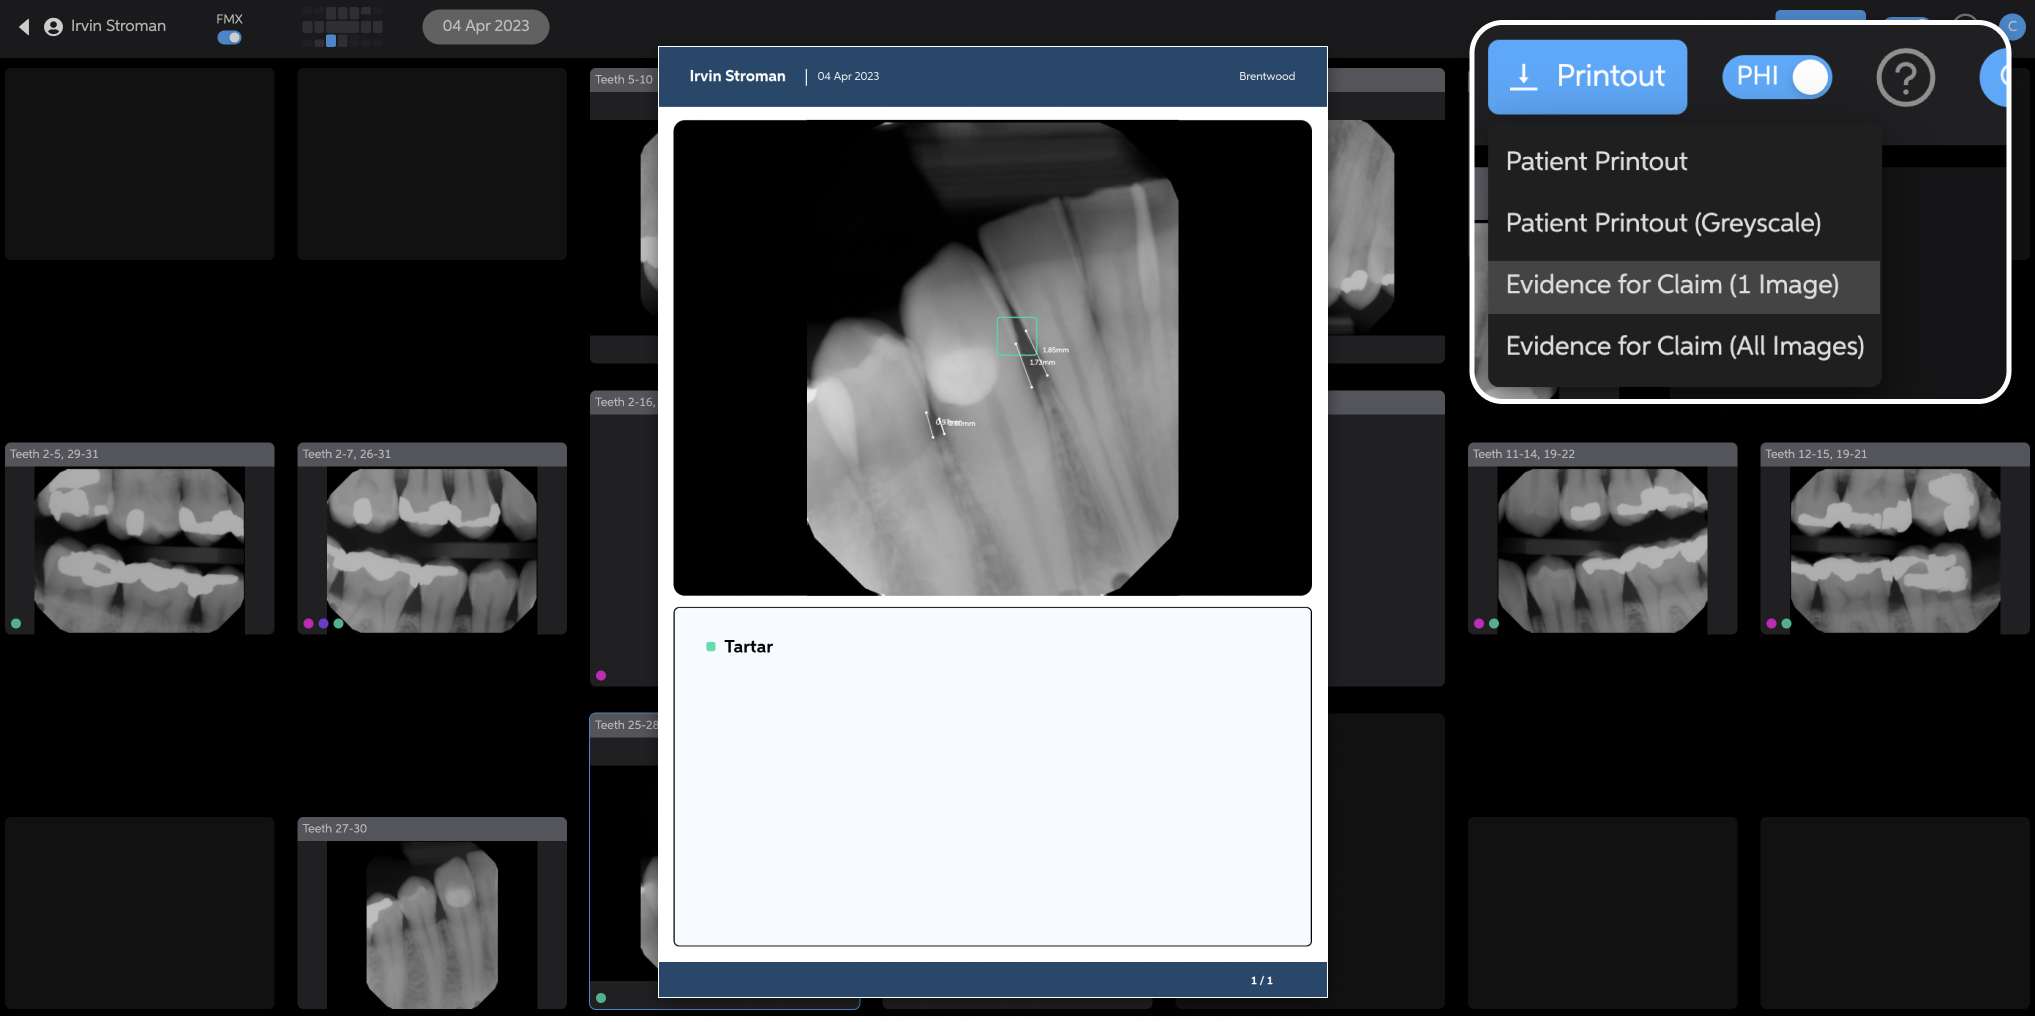
The evidence for claim (all images) option provides a PDF of the entire series of radiographs displaying one radiograph on each page. The detections appear just as they do in the Second Opinion® software and applicable detections are listed under each radiograph.