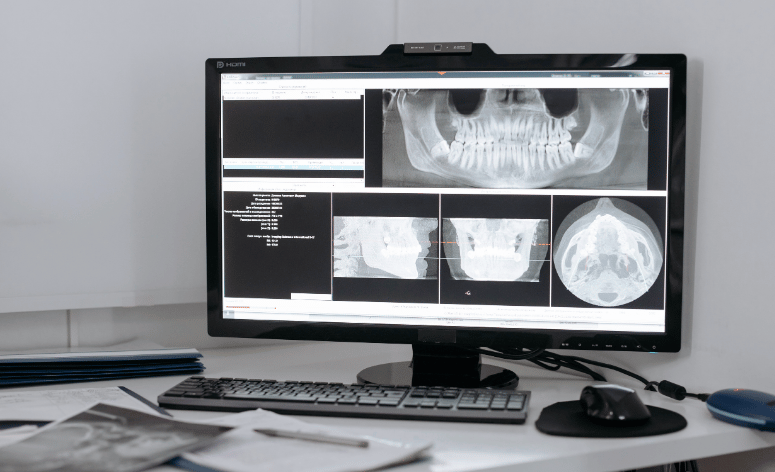
Modern dental practices rely on high-quality imaging every day. Whether you're diagnosing caries, planning an implant, or reviewing bone health, clear and detailed images are key. That’s where dental imaging software comes in. These platforms do more than just store X-rays. They help capture, enhance, analyze, and organize images so you can make faster, more accurate clinical decisions.
Choosing the right dental imaging software means looking beyond basic features. You need something that works well with your existing hardware, integrates with your practice management system, and provides the tools you use most. This guide breaks down how these systems work, why they matter, and how to choose the one that fits your practice best.
What is dental imaging software?
Dental imaging software is a digital tool for capturing and managing diagnostic images. It connects directly to X-ray sensors, panoramic machines, CBCT scanners, and intraoral cameras to process everything from bitewings and periapical shots to 3D scans. Once images are captured, the software lets you enhance, label, store, and retrieve them, often right from a patient’s chart.
Many platforms also include advanced features like:
- AI-assisted image analysis
- Automatic measurements
- Side-by-side comparisons
- Treatment planning tools
These features turn raw images into helpful clinical insights, saving time and improving patient care.
Why is dental imaging software important for modern practices?
Imaging software has changed how dental practices operate. With digital tools, you get faster diagnoses, more efficient workflows, and better patient communication. The benefits are real and measurable.
Improves diagnostic accuracy and precision
Digital imaging lets you see more—and sooner. High-resolution images and contrast tools help identify issues like early-stage caries, root fractures, and bone loss that might go unnoticed with film. These details support better treatment choices and outcomes.
Enhances treatment planning and decision-making
You can’t plan what you can’t see. Imaging software gives you tools like 3D reconstructions, virtual implant planning, and built-in measuring guides. These tools are especially helpful for procedures like orthodontics, endodontics, and oral surgery.
Increases patient engagement and education
Seeing is believing. When you can show patients a clear image of their tooth or jaw and walk them through the problem, they’re more likely to understand your recommendations. This makes it easier to build trust and get treatment acceptance.
Streamlines workflow and efficiency
Digital images are available instantly; no developing, no waiting. You can access them from any operatory, share them with specialists, and store them securely in the cloud. This reduces chair time, lowers costs, and helps your team work more smoothly.
How dental imaging software improves diagnosis and treatment planning
The right imaging software isn’t just about storage; it’s a diagnostic partner that helps you make more confident decisions.
Captures high-resolution, detailed images
Modern sensors capture highly detailed images. With features like zoom, contrast adjustment, and magnification, you can catch tiny cracks, subtle caries, or early signs of bone changes.
Enables early detection of oral health issues
Software tools allow you to compare images over time, track changes in periodontal health, or analyze bone density levels. Some systems even flag potential problems using AI-based suggestions, helping you act early.
Enhances treatment visualization for patients
Patients don’t always understand clinical terms, but they do understand pictures. Using on-screen visuals during consultations makes explaining why treatment is necessary easier, leading to more informed decisions and better follow-through.
Supports accurate, predictable treatment planning
With access to precise measurements and simulation tools, you can plan procedures more confidently. From mapping implant angles to checking occlusion, the right tools lead to better results.
Main types of dental imaging software
Different types of imaging serve different needs. Here’s a look at the main software categories and what they’re used for:
2D radiographic imaging software
This is your basic software for bitewings, periapical images, and full-mouth series. It lets you adjust contrast, zoom in on details, and measure root lengths or bone loss. Great for everyday diagnostics.
3D cone beam CT software (CBCT)
CBCT software is essential for advanced diagnostics. It generates 3D views of teeth, jaws, sinuses, and airway spaces. You can rotate views, slice through layers, and measure bone volume; all helpful for implants, extractions, and surgical planning.
Intraoral camera software
These tools handle real-time visuals from your intraoral camera. They're perfect for documenting before-and-after shots, shade matching, or showing patients close-ups of cracked fillings, decay, or plaque buildup.
Panoramic X-ray software
Pan software captures wide, full-jaw views in one image. It’s used for orthodontic screenings, wisdom tooth assessments, and checking jaw alignment. You can enhance areas of concern and annotate directly on the image.
Cephalometric imaging software
This software is mainly for orthodontics. It analyzes skull and jaw relationships using automated landmark detection and measurement tools. It’s helpful for planning braces, growth guidance, and surgical cases.
How AI is transforming dental imaging software
Artificial intelligence is becoming a key part of modern dental imaging. These systems can analyze X-rays and 3D scans to highlight areas that might need closer examination. For example, AI tools can flag potential cavities, bone loss, or periapical infections quickly and consistently.
These tools don’t replace your judgment. Instead, they act as a second set of eyes. You still make the final call, but AI helps catch things that might otherwise go unnoticed. This saves time, reduces errors, and helps you explain findings more clearly to patients using visual cues and overlays.
Some platforms also use AI to track changes between visits, helping you monitor treatment progress and detect early signs of trouble. It’s a powerful way to support clinical decision-making and improve patient outcomes.
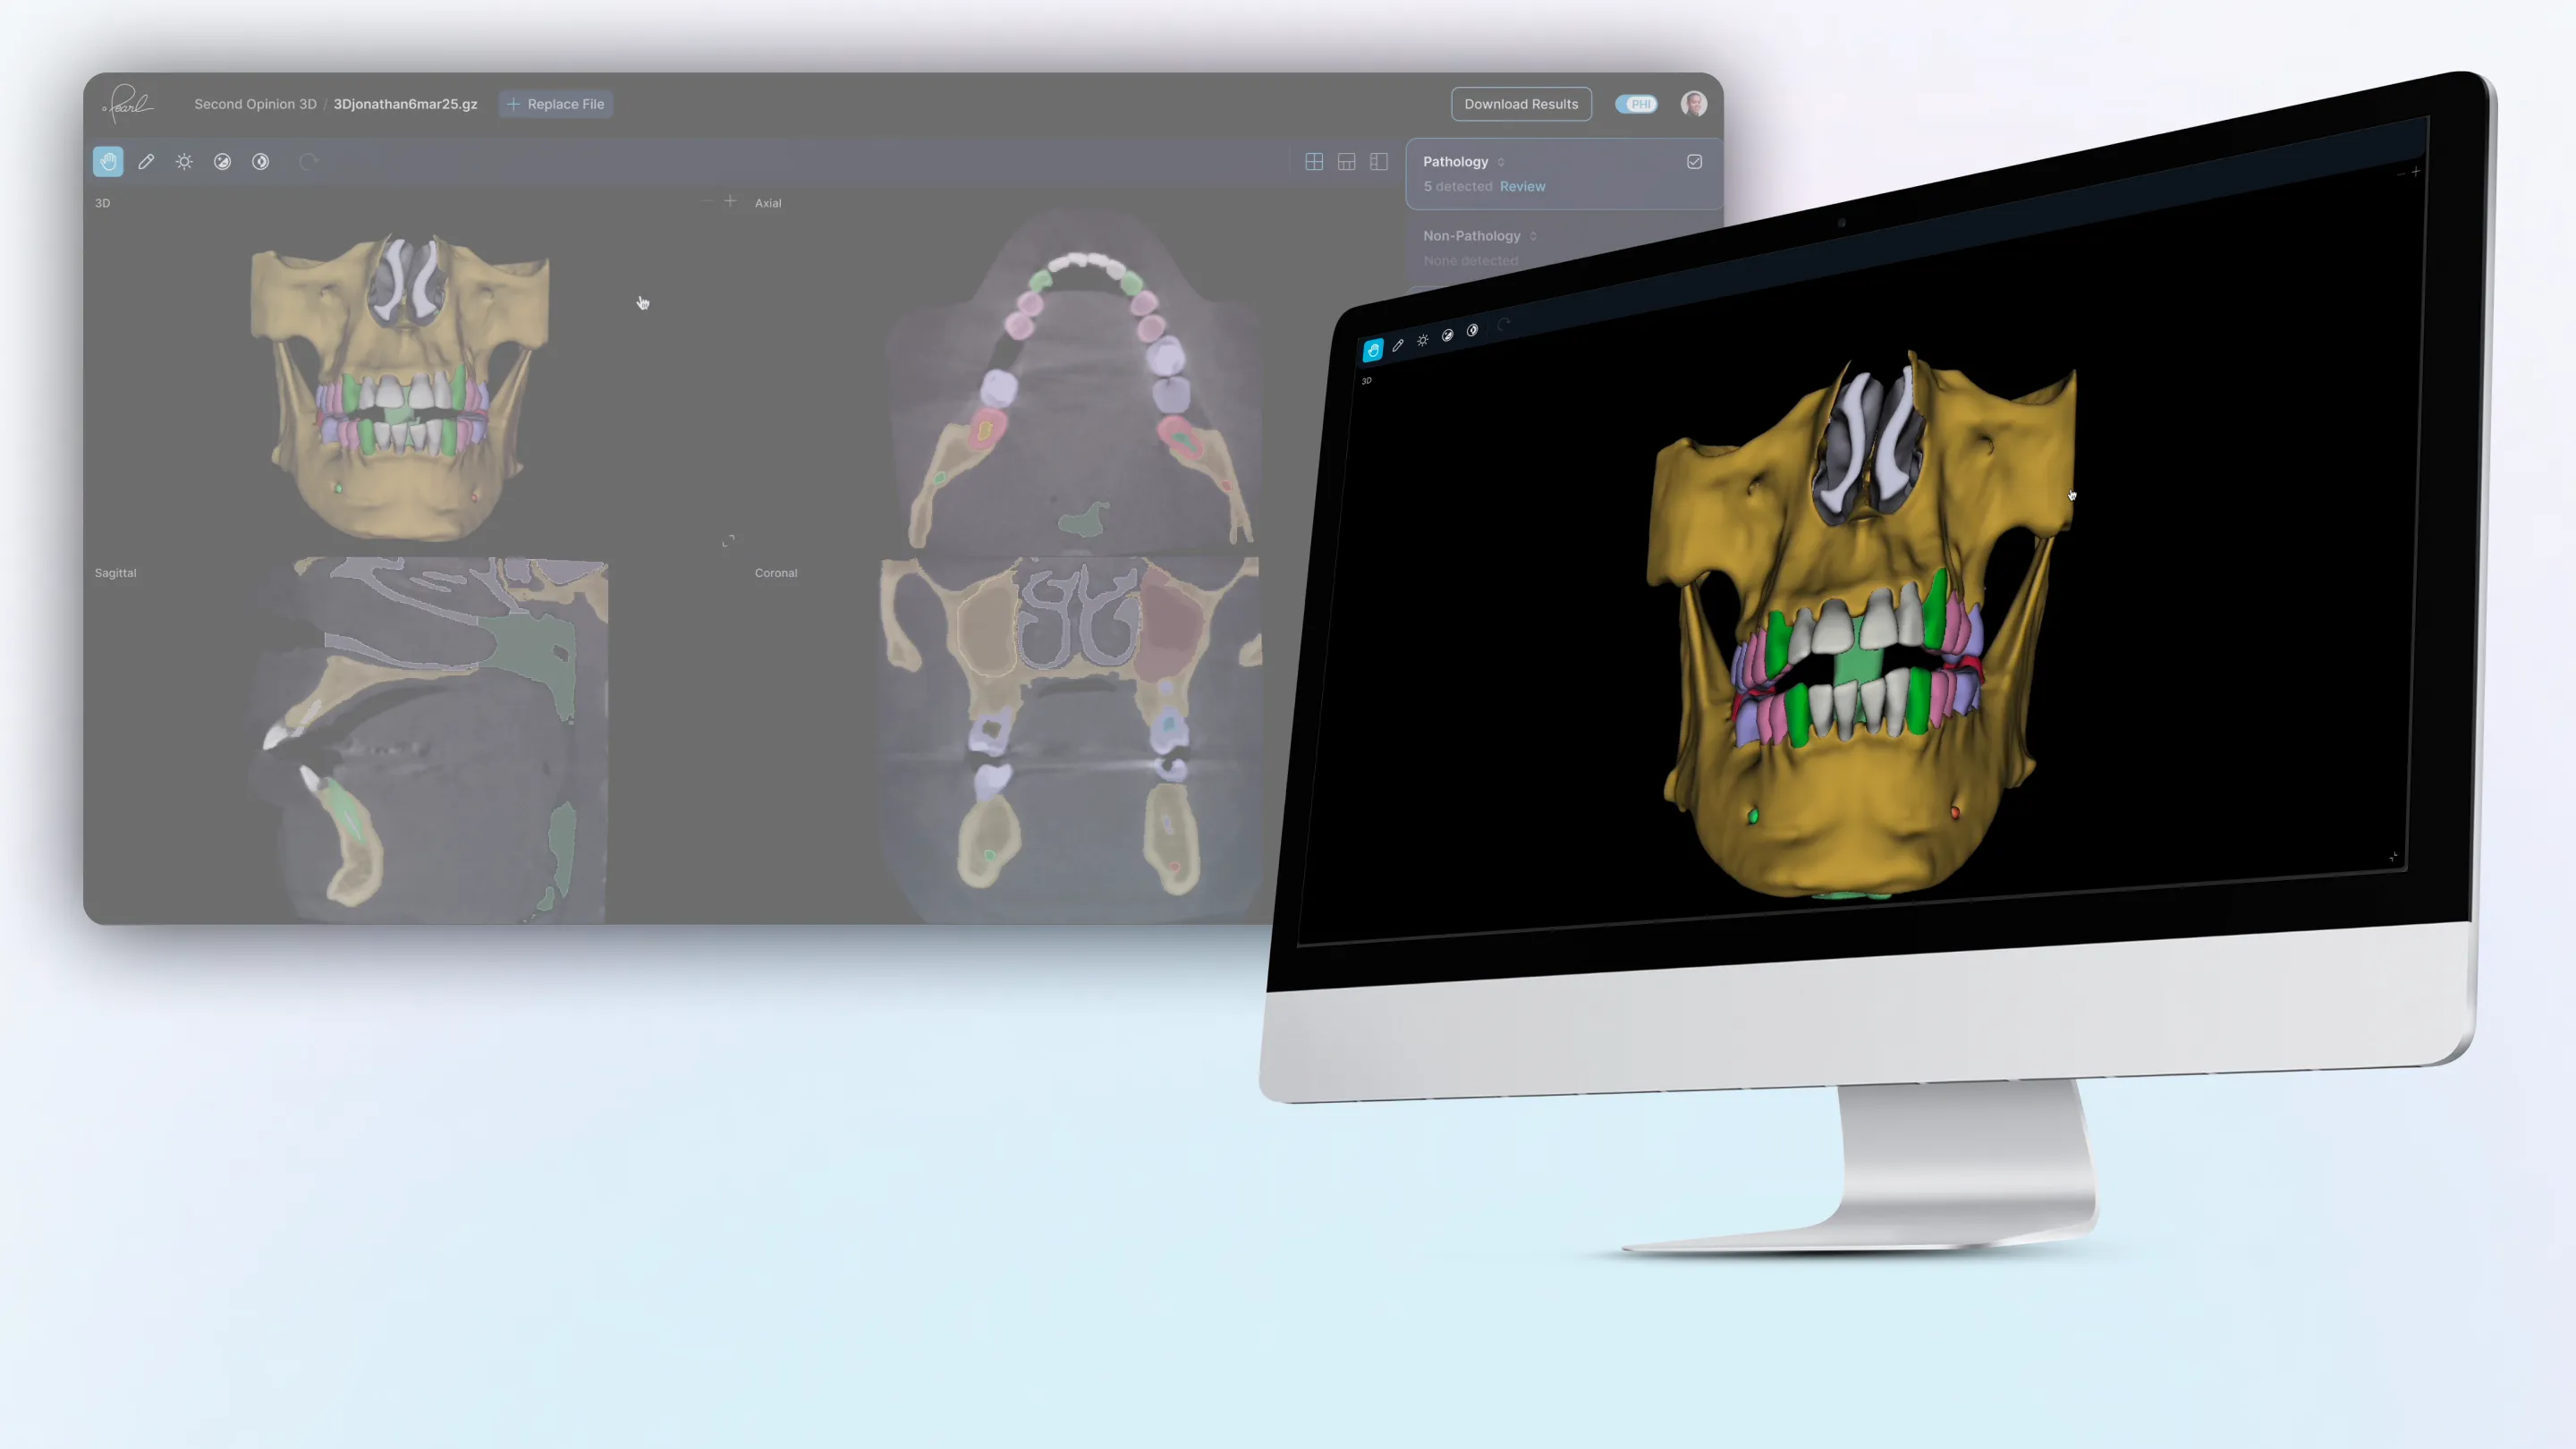
Pearl’s Second Opinion is a prime example of how AI is being used in real-world practices. It serves as a diagnostic support system, helping dentists analyze X-rays and flag signs of conditions like cavities, bone loss, and calculus. It acts as a second set of eyes, helping you catch issues early and support more consistent diagnoses.
For broader insights, Practice Intelligence aggregates clinical data to spot treatment gaps and uncover missed revenue opportunities, all grounded in the analysis of diagnostic imagery.
How to choose the best dental imaging software for your practice
Not all imaging software is the same. Picking the right one depends on your clinical needs, budget, and the systems you already use. Here’s what to consider:
Ensure compatibility with your existing systems
Before you commit, double-check that the software works with your current sensors, cameras, and imaging hardware. Replacing working equipment just to make a new system function can be expensive and unnecessary.
Assess image quality and diagnostic capabilities
Look for software that delivers high-resolution images with clear contrast. Features like zoom, annotations, and enhancement tools can make a big difference in your ability to diagnose accurately.
Prioritize user-friendly interfaces and training support
Your software should be easy for your team to use. A clean interface, logical workflows, and responsive support all make adoption smoother. Good training materials, like videos or live sessions, help your staff get up to speed quickly.
Look for integration with practice management software
Choosing imaging software that syncs with your practice management system means less double entry and better coordination between the front desk and clinical teams. Patient records, images, and treatment plans stay organized in one place.
Verify security and compliance features
Make sure the platform uses strong encryption, offers secure cloud backup options, and meets HIPAA compliance standards. Patient data security is a legal and ethical priority, so don’t skip this step.
Compare costs, licensing, and support plans
Some platforms charge upfront fees, others work on subscription models. Take time to compare pricing, including support, updates, and additional features, so you’re not surprised by ongoing costs down the line.
How accurate is dental imaging software compared to traditional methods?
Digital imaging software gives you clearer, more detailed pictures than film. You can zoom in, enhance contrast, and take multiple views without extra radiation exposure. In fact, digital systems often reduce radiation by 80% to 90% compared to traditional X-rays.
Plus, with digital tools, you can store and compare images easily over time, track progress, and even use AI to help confirm what you see. This all adds up to better diagnostics and fewer surprises during treatment.
Preparing to implement dental imaging software in your practice
Switching to new software takes a little planning. Start by making sure your team is trained and your hardware is compatible. You might need to update your network or install new drivers. Work with the software provider to set up data transfers and test the system before going live.
You’ll also want to set up internal workflows: who captures the images, who reviews them, and how they get stored or shared. Clear protocols keep everyone on the same page and help you get the most out of your investment.
Once you’re up and running, the benefits will be clear. Your imaging will be faster, your diagnoses more accurate, and your patients more engaged in their care.
FAQs
What features should I look for in dental imaging software?
Look for high-quality image capture, editing tools, secure storage, and seamless integration with your current systems. Bonus points for features like AI support, 3D visualization, and patient education tools.
What security measures protect patient data in dental imaging software?
Reliable platforms use HIPAA-compliant encryption, secure cloud backups, and controlled access settings. These tools help protect patient privacy and reduce the risk of data breaches.
What are the limitations of dental imaging software?
While software improves diagnostics, it depends on hardware quality and user training. Even with advanced tools, poor image capture or rushed analysis can still lead to missed details.
How much does dental imaging software typically cost?
Costs vary widely. Basic software might cost a few thousand dollars upfront, while advanced systems with AI and 3D capabilities can run into the tens of thousands. Always factor in ongoing support, updates, and training when budgeting.

-%20Why%20does%20the%20industry%20need%20AI%3F.webp)